This is the start of my in-depth Elementor series — a hands-on, screenshot-by-screenshot walkthrough of the page builder I use to design almost every WordPress site I build, including this one. We begin right at the beginning: understanding what Elementor is, getting it installed, and building your very first page with it. If you’ve never touched a page builder before, don’t worry — Elementor is drag-and-drop, no code, and I’ll point out exactly what to click at each step.
📚 Part 1 of my in-depth Elementor series (within my WordPress Plugin Guides). Follow the ten parts in order to go from a blank page to a complete, professionally built landing page. Every screenshot was captured in a real, free WordPress Playground, so you can follow along with zero risk to a live site.
What Elementor actually is (and why you’d want it)
Out of the box, WordPress lets you write posts and pages in a fairly simple block editor (Gutenberg). That’s perfectly fine for text. But the moment you want a properly designed page — a hero section, columns that line up, spacing that’s just so, buttons that look the part — you start fighting the limits of your theme and the basic editor.
Elementor replaces that experience with a visual, drag-and-drop builder. Three things make it special:
- You see exactly what visitors will see. You design directly on a live preview of the page — no “save and check the front end” guessing.
- You drag elements (called widgets) onto the canvas and arrange them however you like — no theme can box you in.
- You style everything by clicking on it. Colors, spacing, fonts, backgrounds — all in a side panel, all without code.
It’s the most popular page builder in the world — comfortably over 10 million active installs — for a simple reason: it’s genuinely powerful without being intimidating. It works alongside your theme, taking over the design of any page you choose.
Installing Elementor
Elementor installs like any other plugin. In your WordPress dashboard:
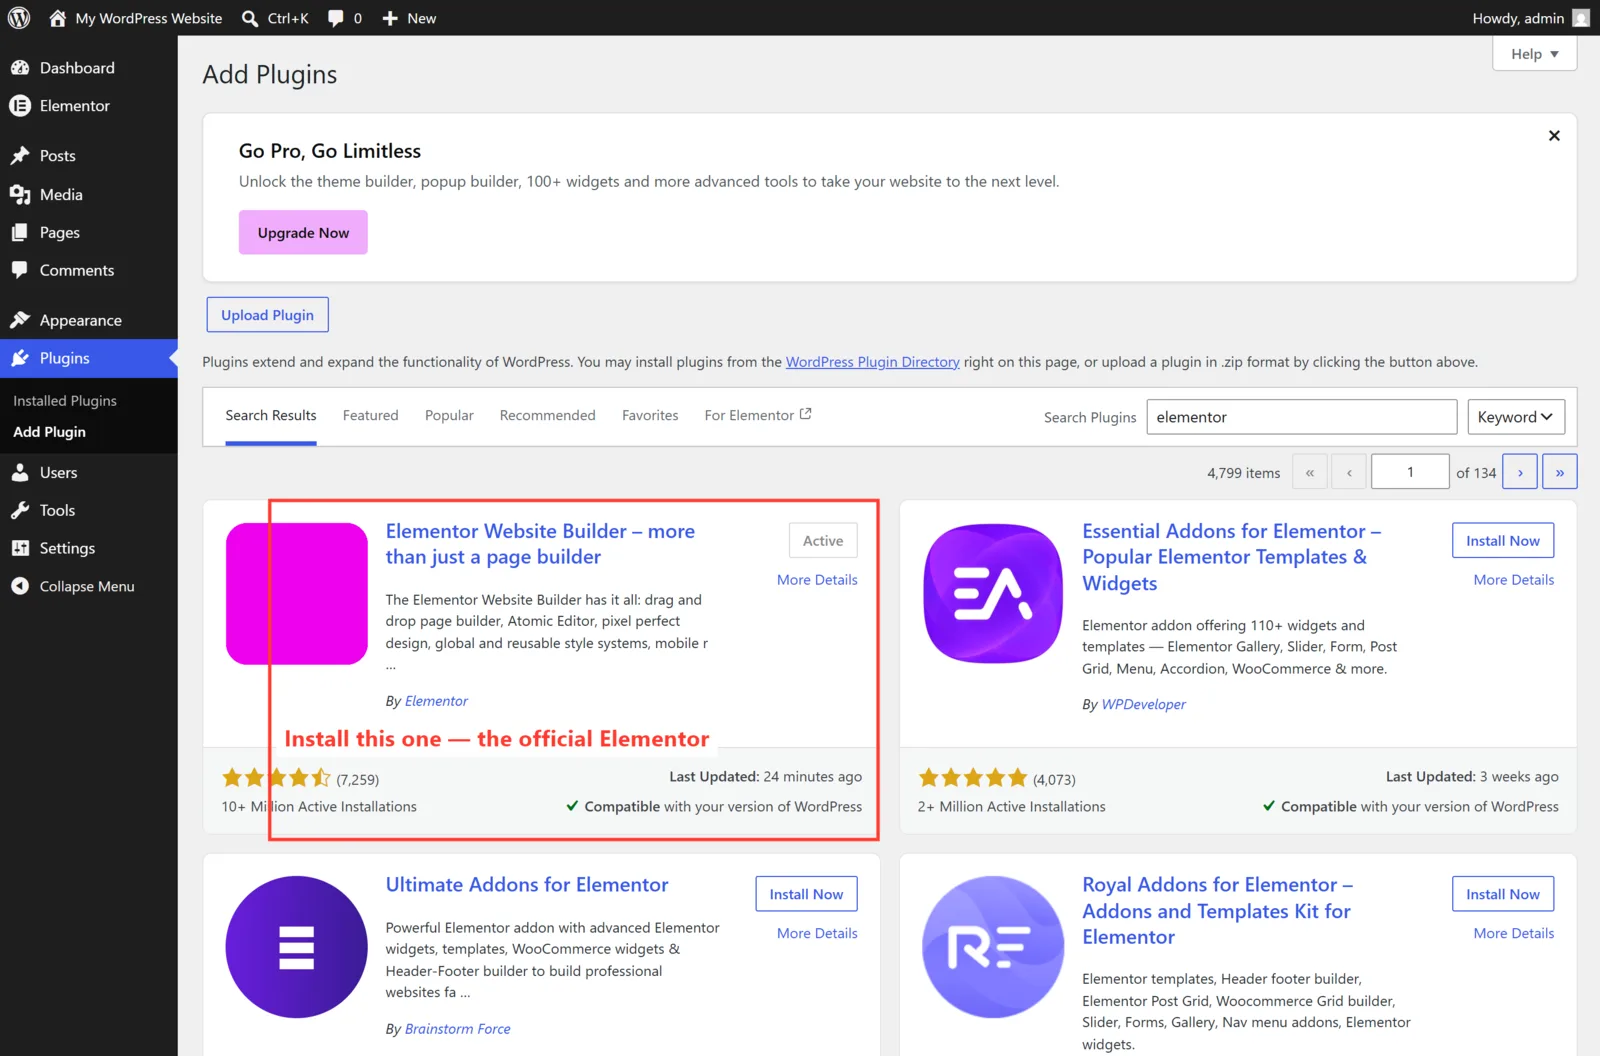
- Go to Plugins → Add New Plugin.
- Search for “Elementor”. The full name is Elementor Website Builder, by Elementor.com — it’s the first result, and with millions of installs it’s hard to miss.
- Click Install Now, then Activate.
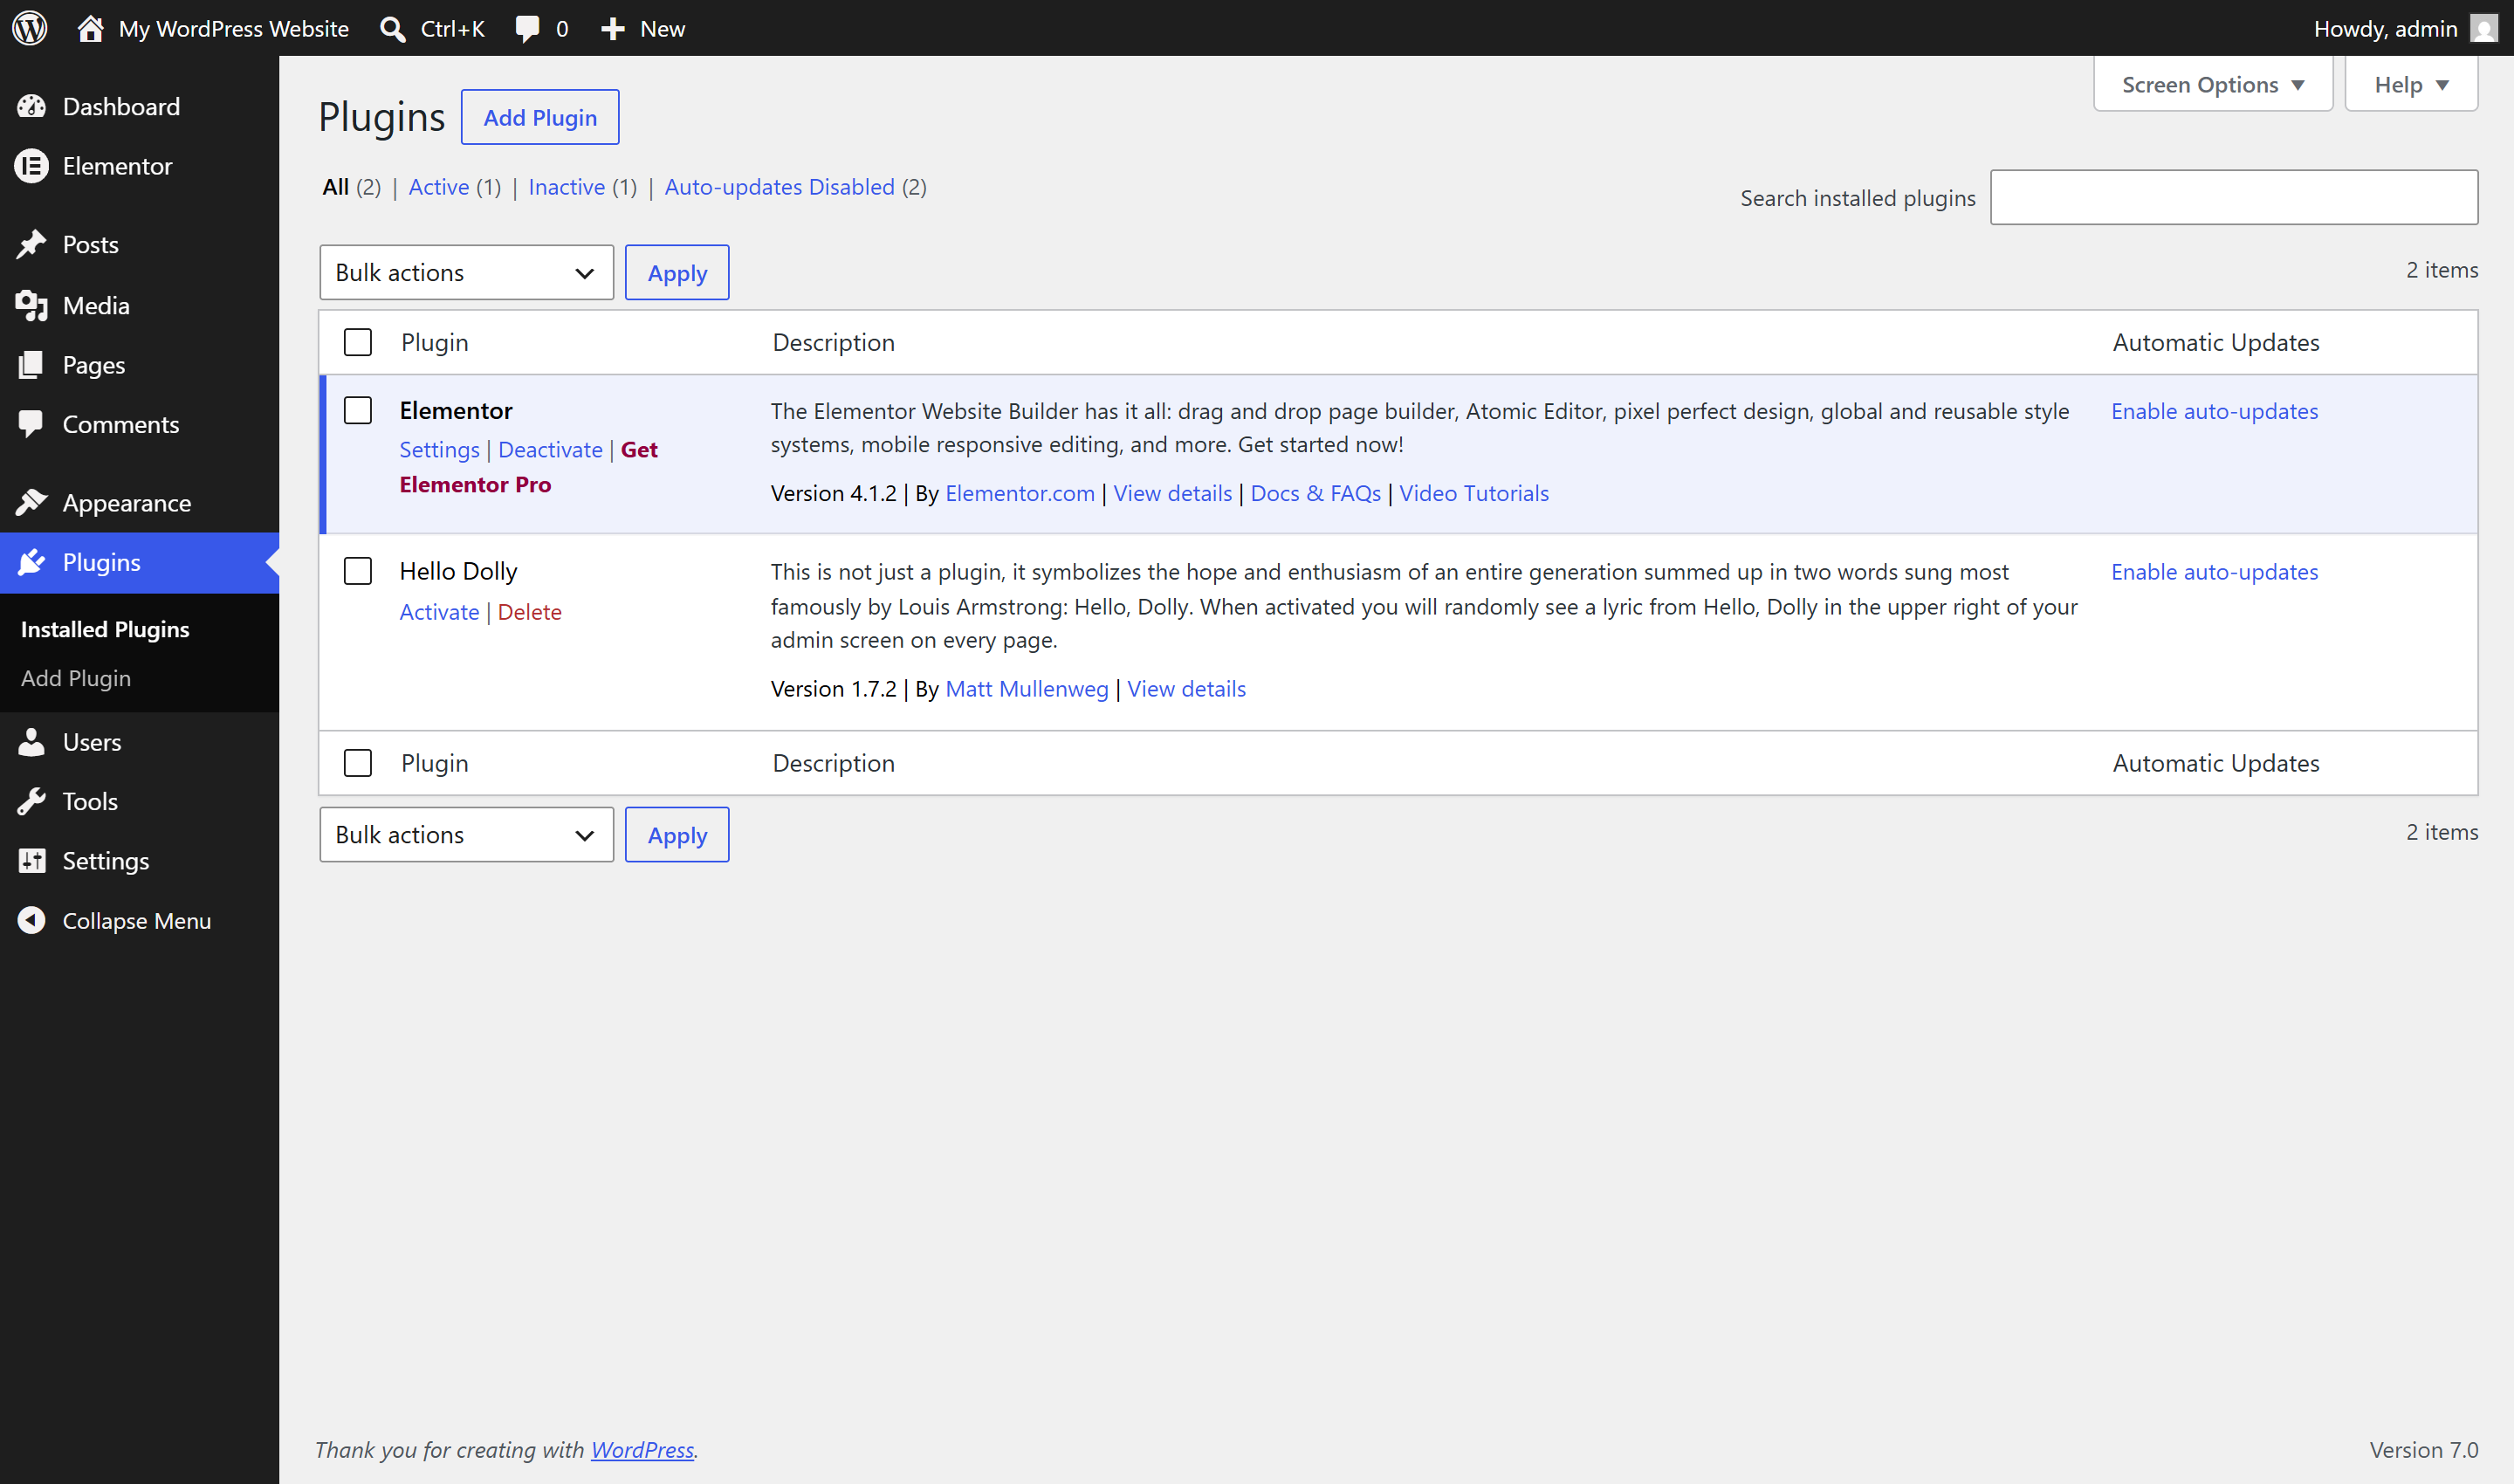
Once it’s active, you’ll see it in your plugins list, and a brand-new Elementor menu appears in your sidebar — that’s your design control center from now on (it’s where global settings and the template library live, which we’ll use later in the series):
Free vs Pro: what you actually need
You’ll notice Elementor nudging you towards Elementor Pro. Here’s my honest take after building hundreds of sites: the free version is genuinely capable, and it’s the perfect place to learn. Everything in this entire series — the hero, the feature row, the services, the FAQ, the full landing page — is built on free Elementor.
- Free gives you the editor, containers, the essential and most content widgets, responsive controls, and global colors and fonts. That’s enough to build a beautiful, complete site.
- Pro adds the bigger guns — the Theme Builder (custom headers, footers and templates), a proper Form widget, popups, dynamic content, and dozens of extra widgets. We tour those in Part 10.
My advice: start free, learn the fundamentals, and only buy Pro when you hit a specific wall (usually custom headers/footers or forms). You’ll know when you need it.
⚠️ You don’t need a paid account to start. After activating, Elementor may invite you to connect an account or jump into an AI onboarding flow. You can skip all of it — Elementor works perfectly without it. Don’t let that step stop you from getting to the editor.
Building your first page
Let’s actually build something. Create a page the normal way — Pages → Add New Page — give it a title, and then look for the button that changes everything:
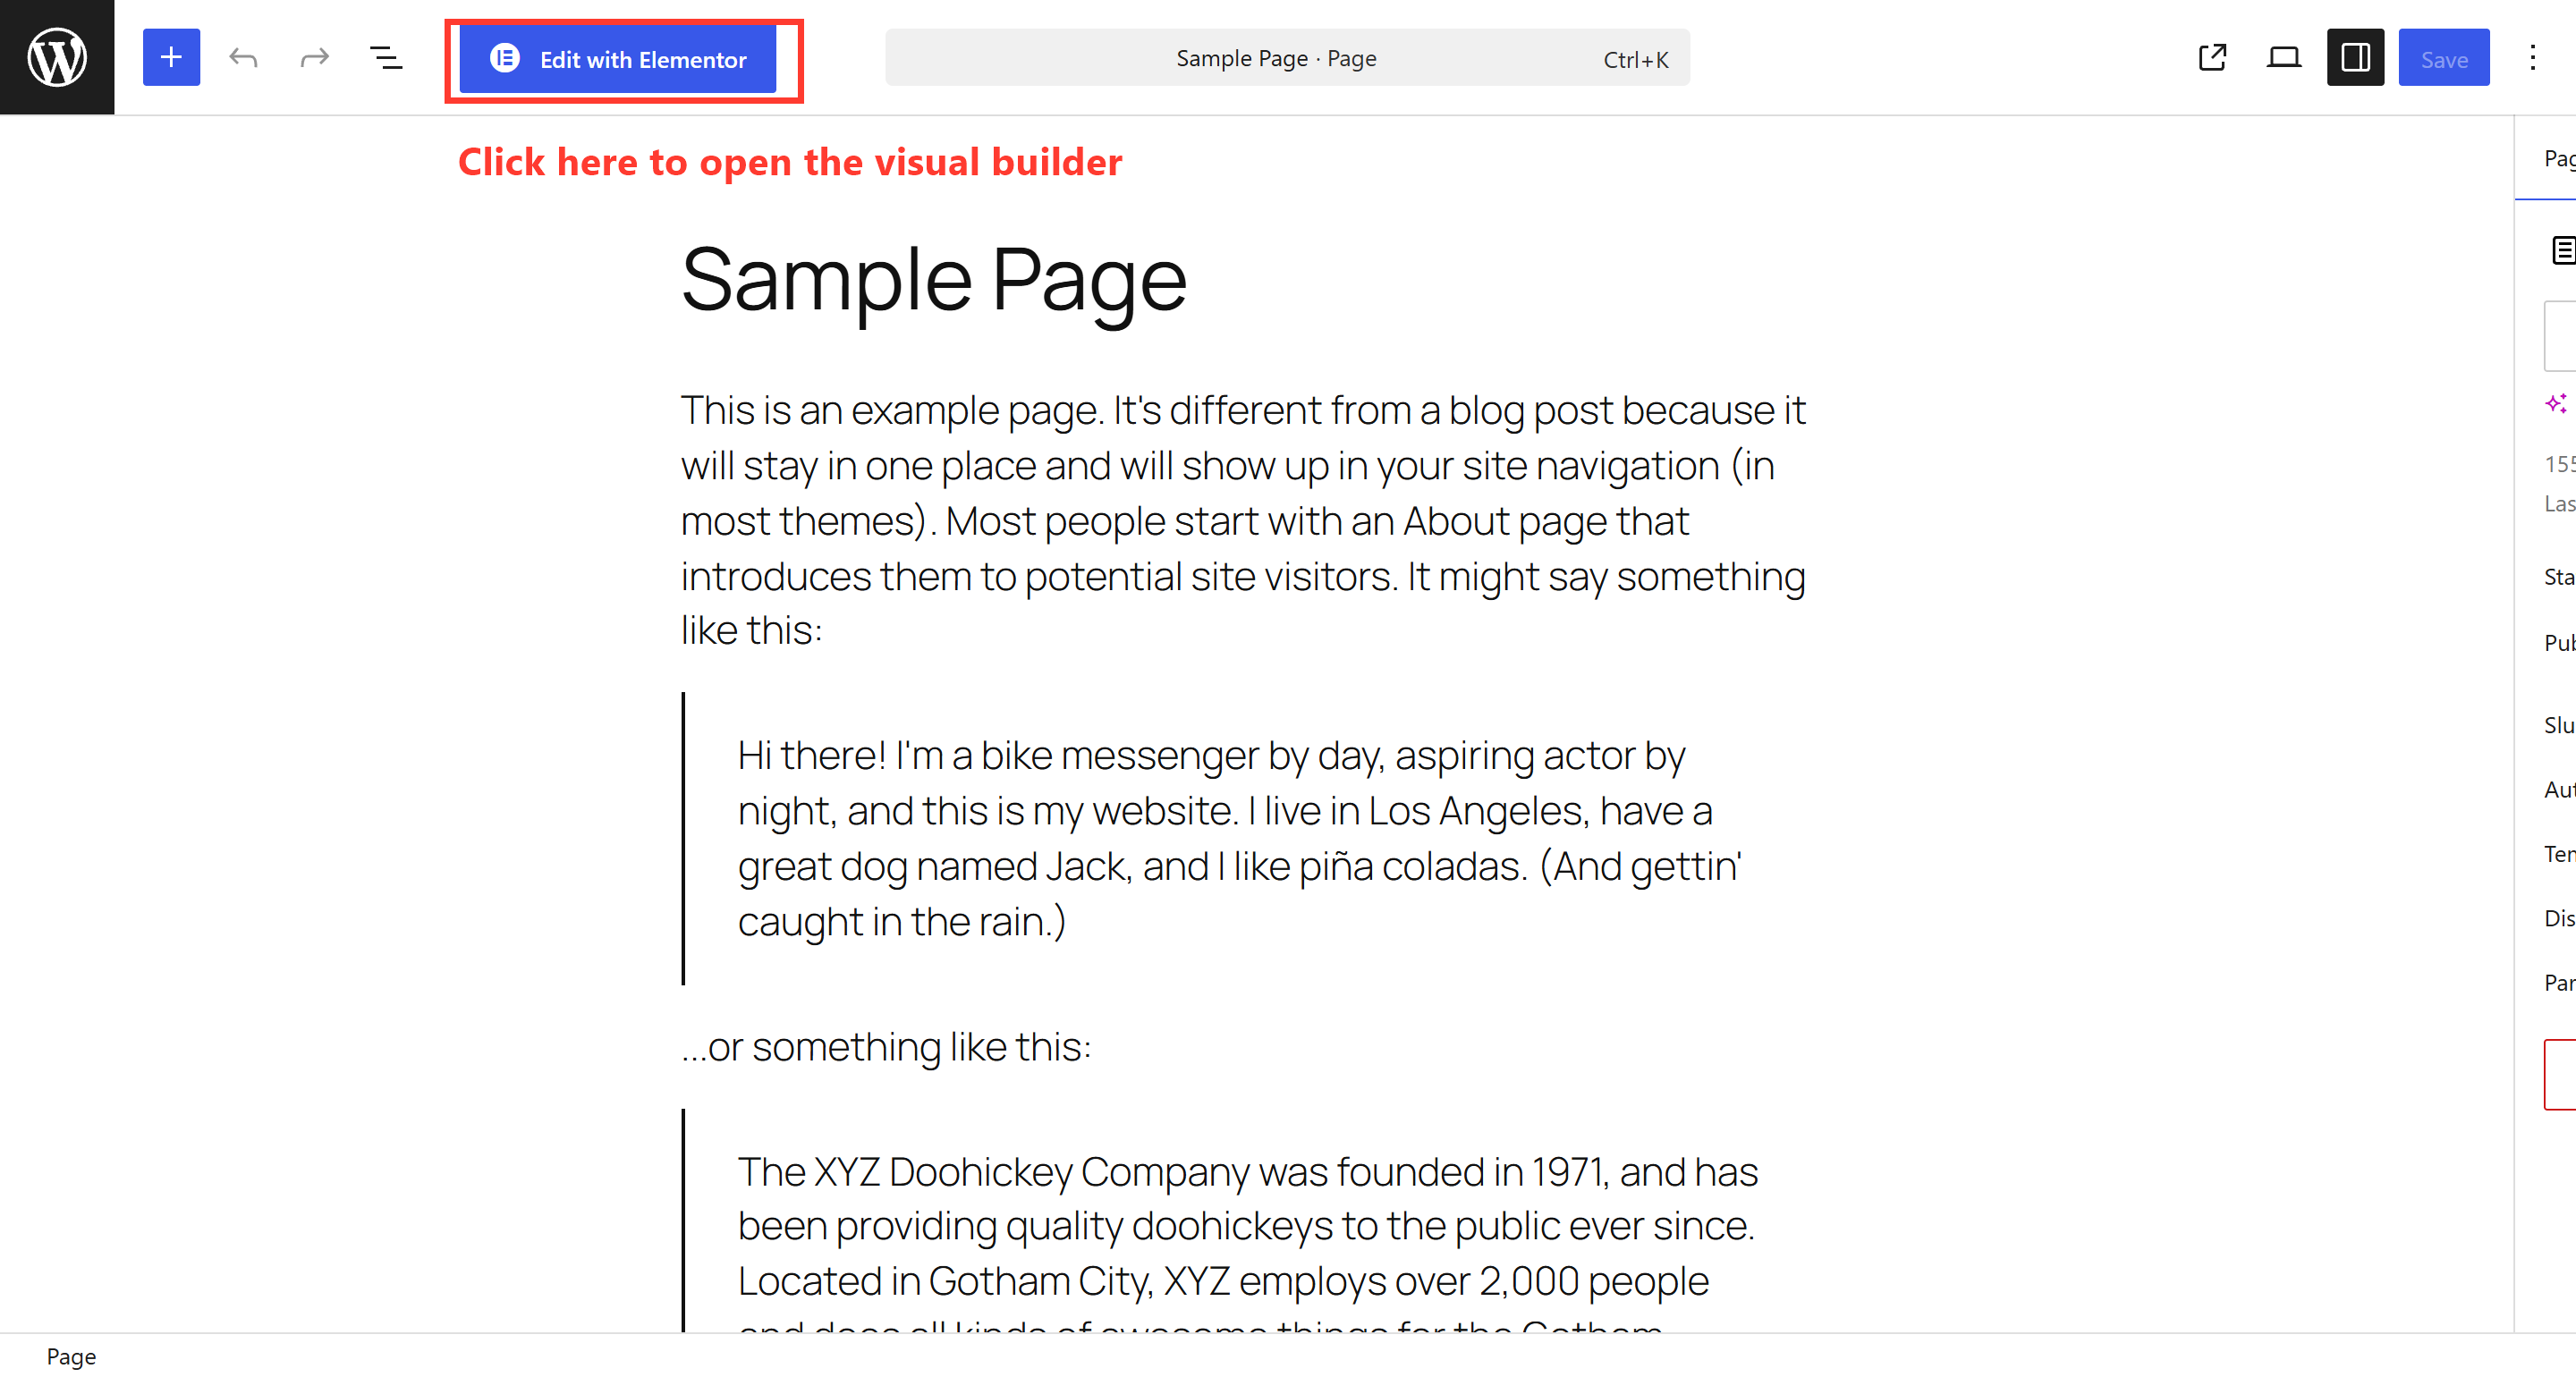
Click Edit with Elementor and the page opens in the visual builder. This is where you’ll spend your time from now on.
Meet the editor
The Elementor editor looks busy at first, but it’s really just three areas — learn to name them and you’ll never feel lost:
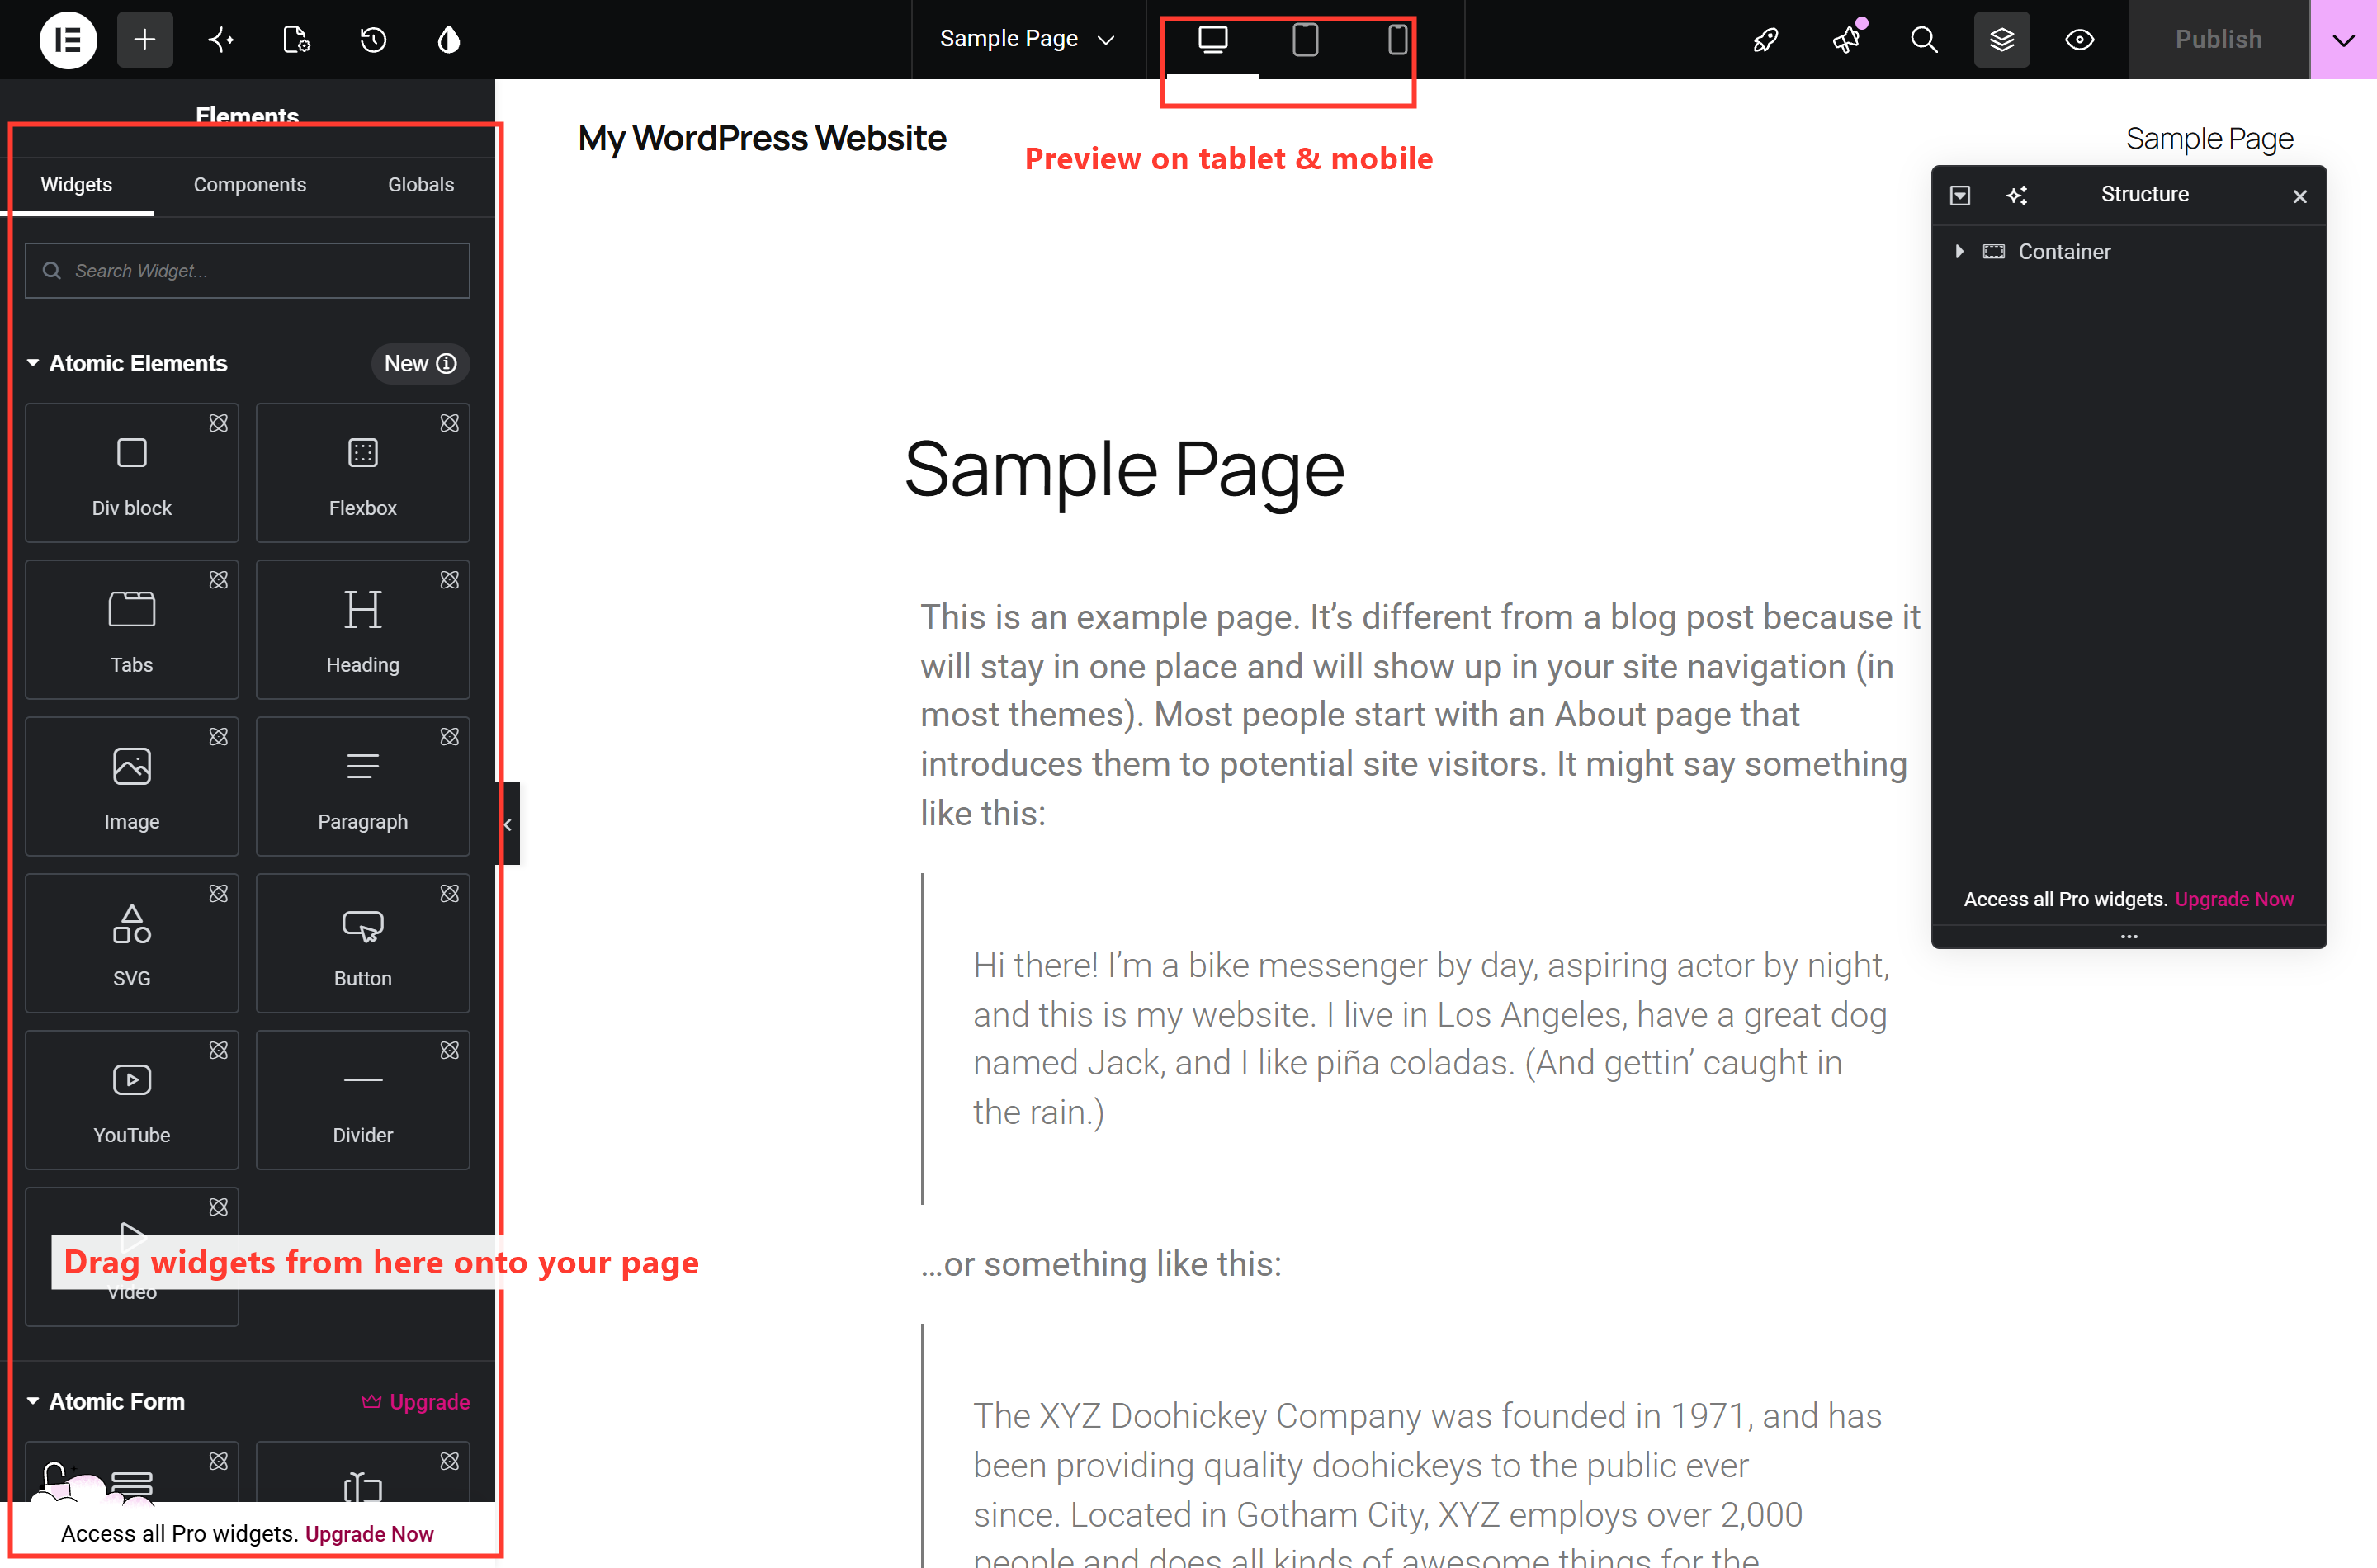
- The panel on the left — your library of widgets (Heading, Image, Button, and so on). You drag these onto the page, and it’s also where each element’s settings appear when you select it.
- The canvas in the middle — a live preview of your page. What you see here is exactly what visitors will see.
- The controls up top and along the bottom bar — responsive previews (desktop / tablet / mobile), site settings, the Navigator, and the all-important green Publish button.
To add anything, you simply drag a widget from the left panel onto the canvas, drop it where you want it, and then style it by clicking on it. When you’re happy, hit Publish and your page is live. That’s the whole loop — drag → drop → style → publish — and everything else in this series builds on it.
🚀 Try it yourself: Open WordPress Playground — a free, instant WordPress in your browser — go to Plugins → Add New, and install Elementor. Then create a page, click Edit with Elementor, and drag a few widgets around. It’s a throwaway sandbox: the perfect place to click without fear before you touch your real site.
What’s next
Elementor is installed and you’ve met the editor. In Part 2, I’ll give you a proper tour — the panel, the Navigator, and the container-and-widget model every page is built on — so you always know where you are and what you’re clicking. Continue to Part 2 →
Want a website built in Elementor properly — fast, polished, and easy for you to update yourself? That’s what I do for a living. See how I can help build your site in Elementor.